For this section, I grouped weeks 3-5 together as I was mostly working on my animation.
On Monday (02/03/26), the production part of the animation process began and we learned how to use Toon Boom Harmony. Thankfully, through my experience of working in Toon Boom in the Out of your Head project, I was able to immediately get started with animating the characters. However, I had trouble as I didn’t have an X-sheet yet, and I still didn’t know how exactly to make one since I was absent from that lesson. After getting helpful advice from Jess, I spent a few days making my X-sheets, which subsequently helped map out where the mouth movements would approximately go (see X-sheets in PDF).
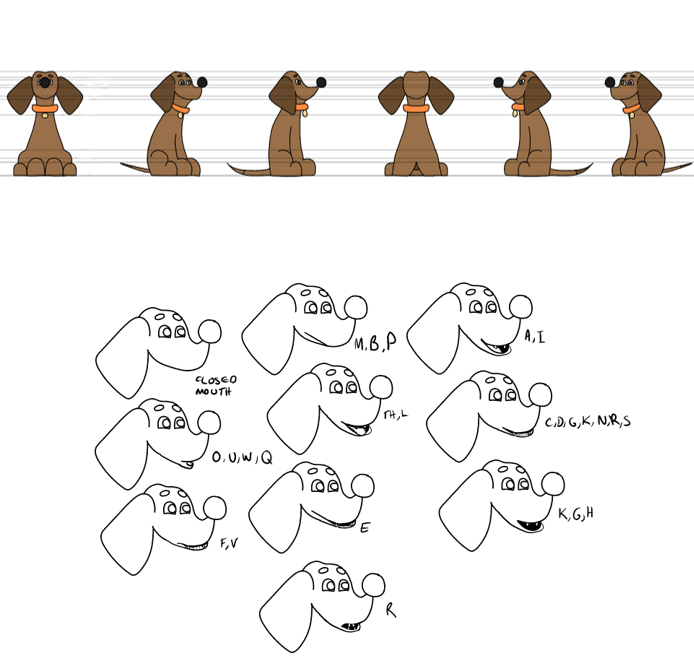
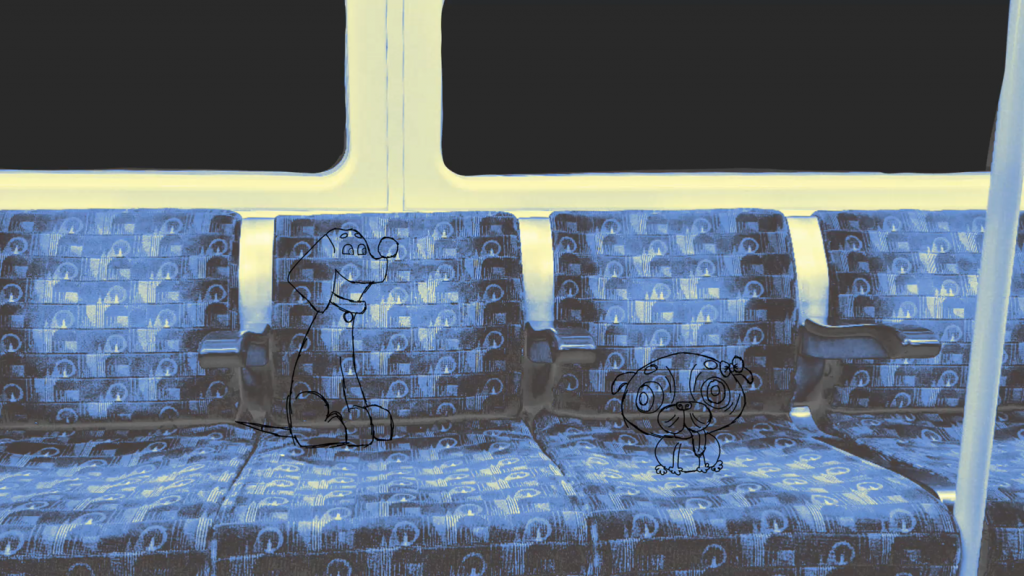
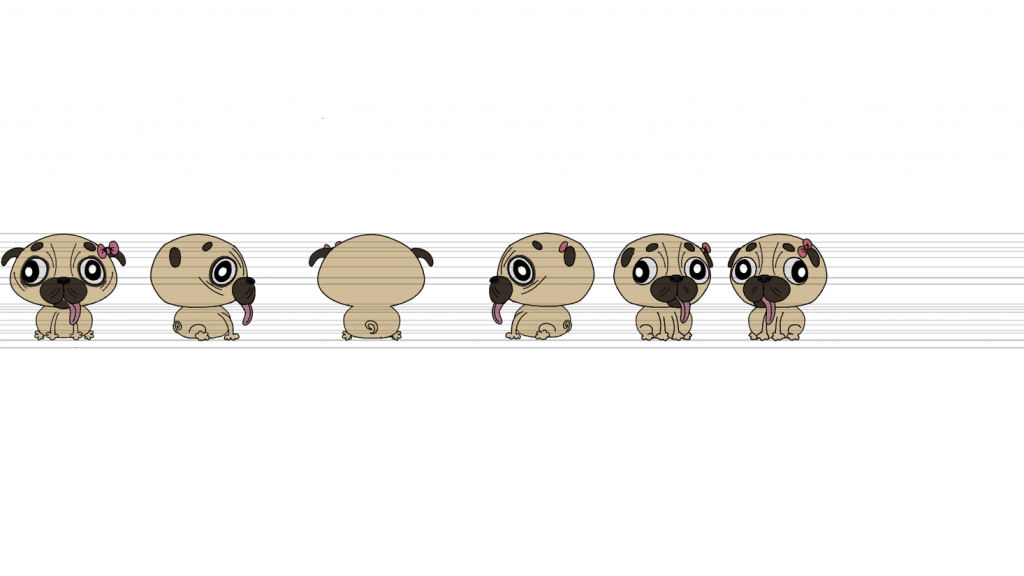
During this time I made Yappie’s character turnaround sheet for the animation and made a mouth shape sheet. For her initial design, I wanted to convey her silliness and give her a unique sillhouette, therefore I made her ears bigger, eyes smaller and on either side of her nose (in the front view, in the other views it’s not evident), and her nose perched on her face almost like she’s balancing a ball. Once I reproduced her design and compared her size with Schnorkle’s, I realised she was far too big and looked more like a labrador than a dachshund.
Yappie’s original character turnaround and mouth shape sheets.
First and second versions of the animation.Click the photos above to be redirected to Padlet.
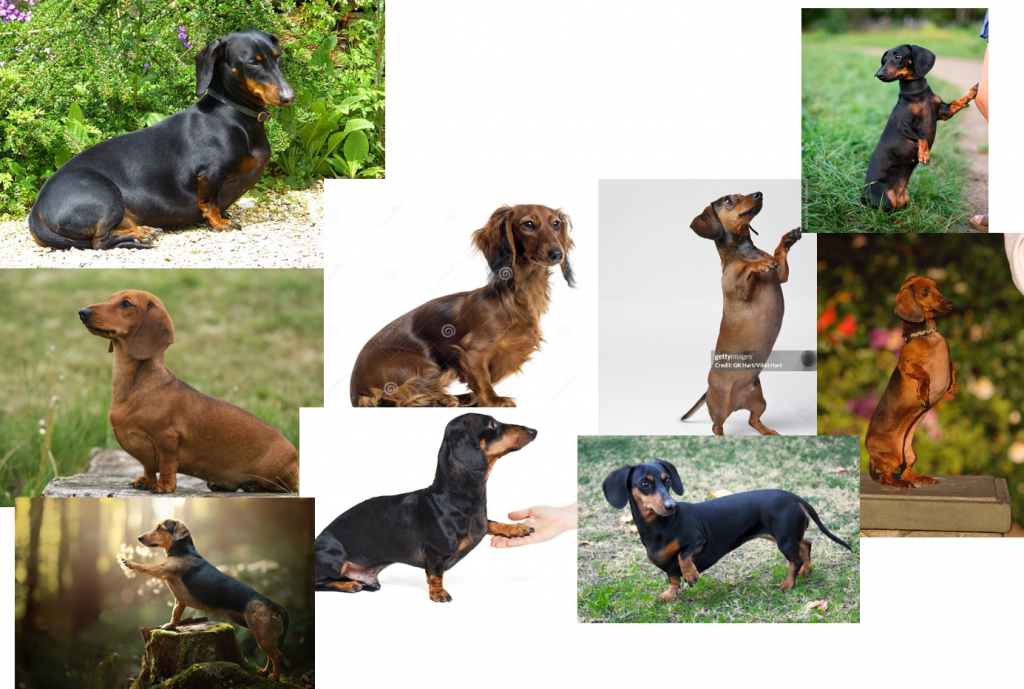
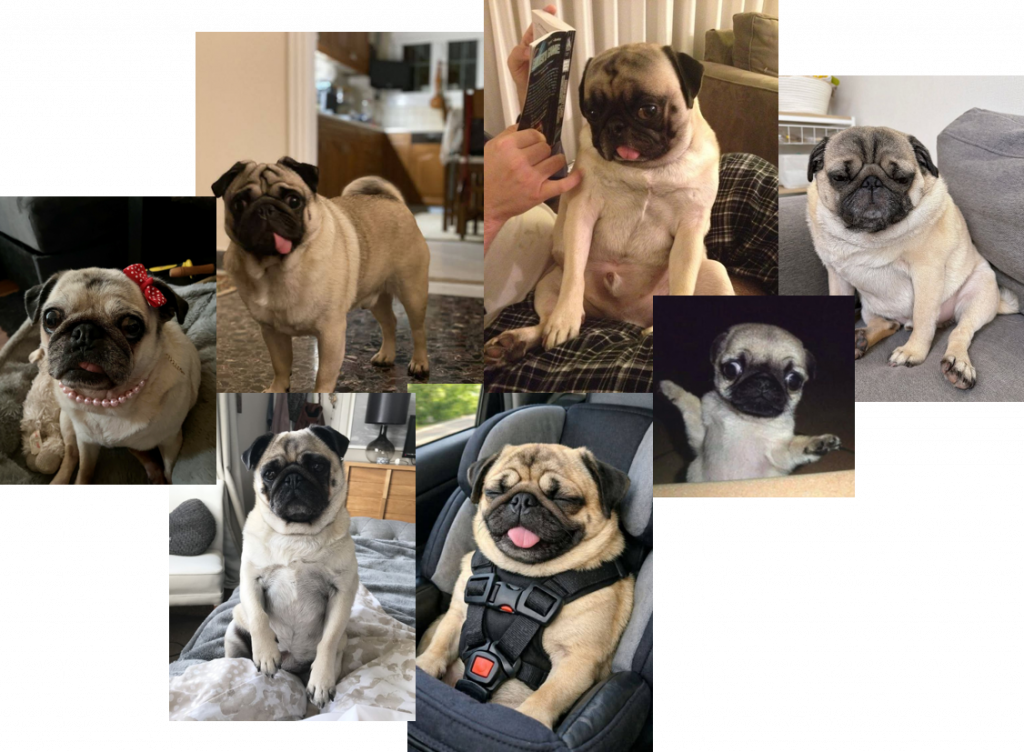
Therefore, I changed her design to reflect her breed, especially with the way she sits. To help draw with accuracy, I made moodboards for each character.
Yappie
Schnorkle
Dachshunds have an elongated body shape, so there is a lot of distance between their front and hind legs. They sit with their hind legs tucked underneath their body, something I didn’t capture in my original design. I also added changes that were merely a personal choice rather than one that reflects the dog breed itself: I made the ears more angular and nose in line with the eyes, and changed the colour of her collar to yellow to match the colour scheme and her bubbly, energetic personality. (see new turnaround + mouth shape sheet in PDF).
Later on, I changed Schnorkle’s design and gave her a blue bow rather than a pink one, to reflect her quiet demeanour and contrast with Yappie’s yellow.
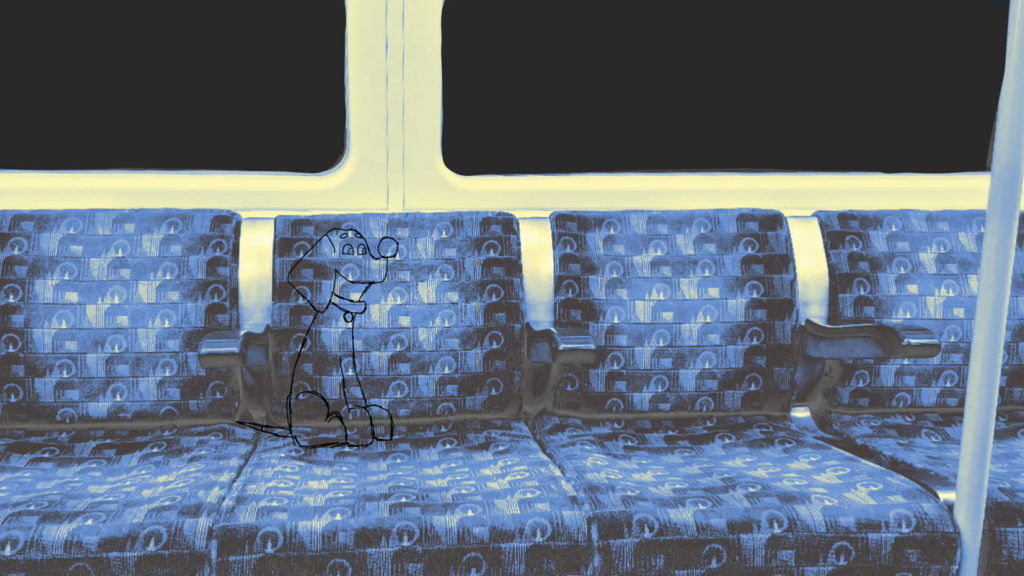
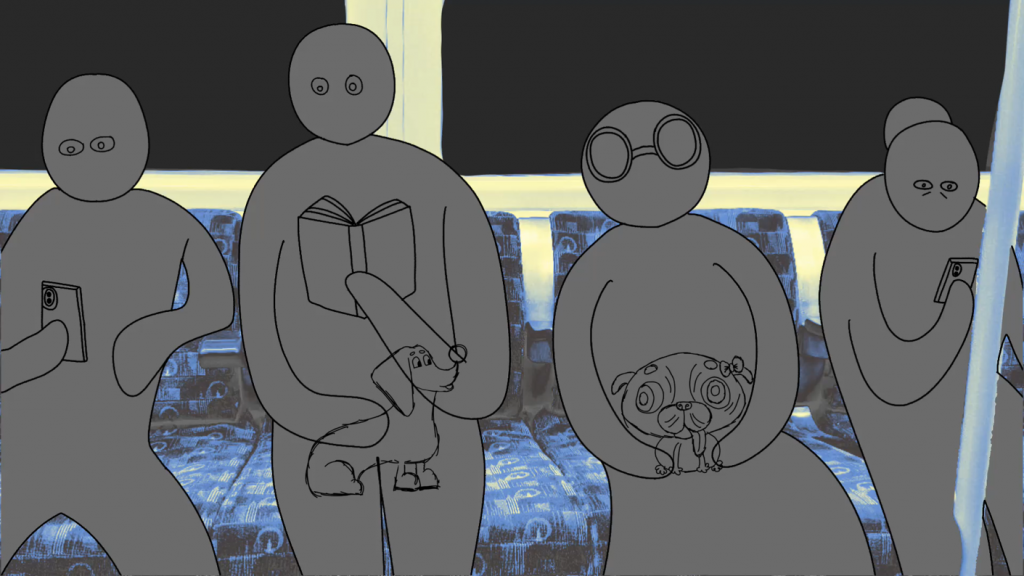
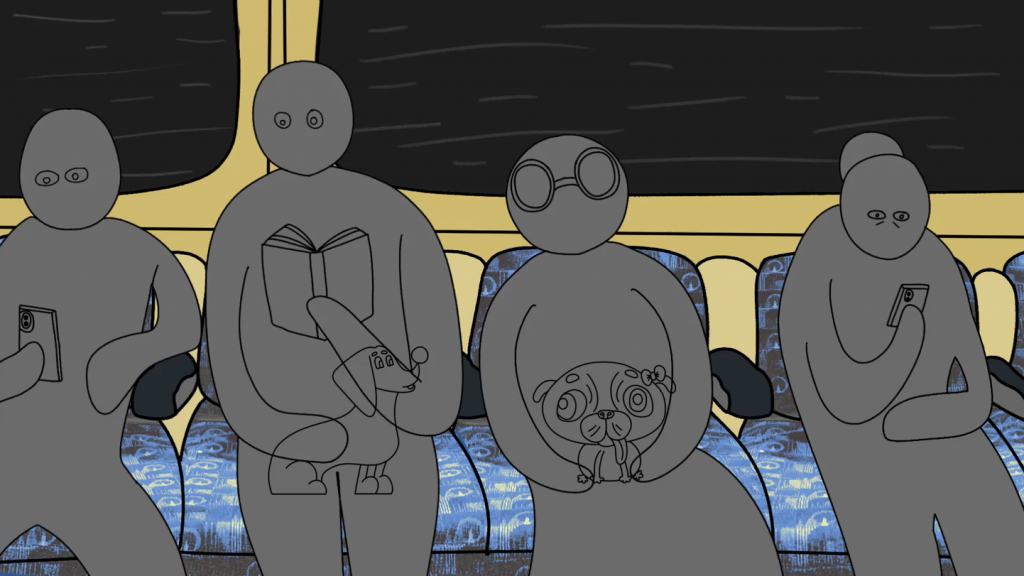
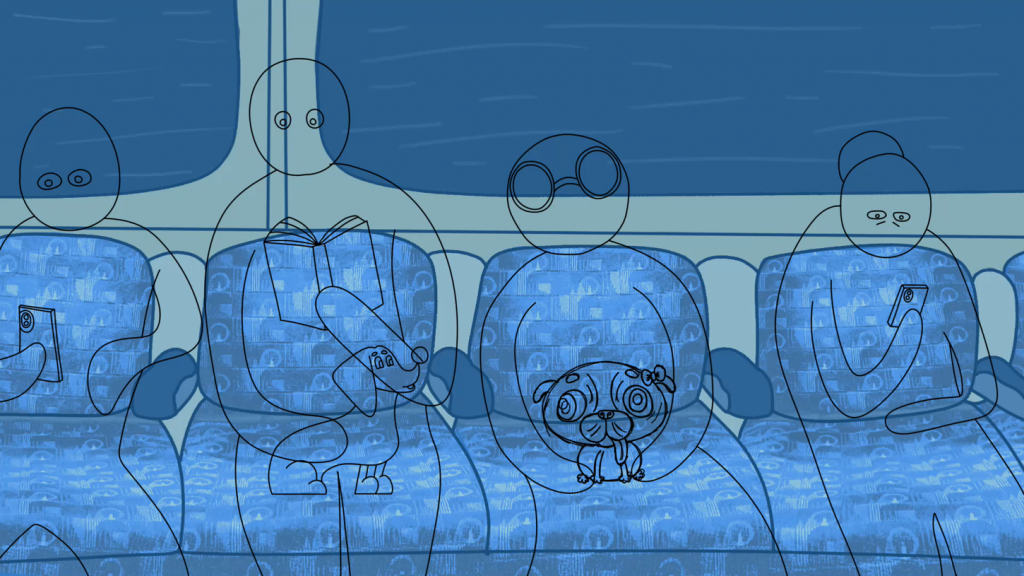
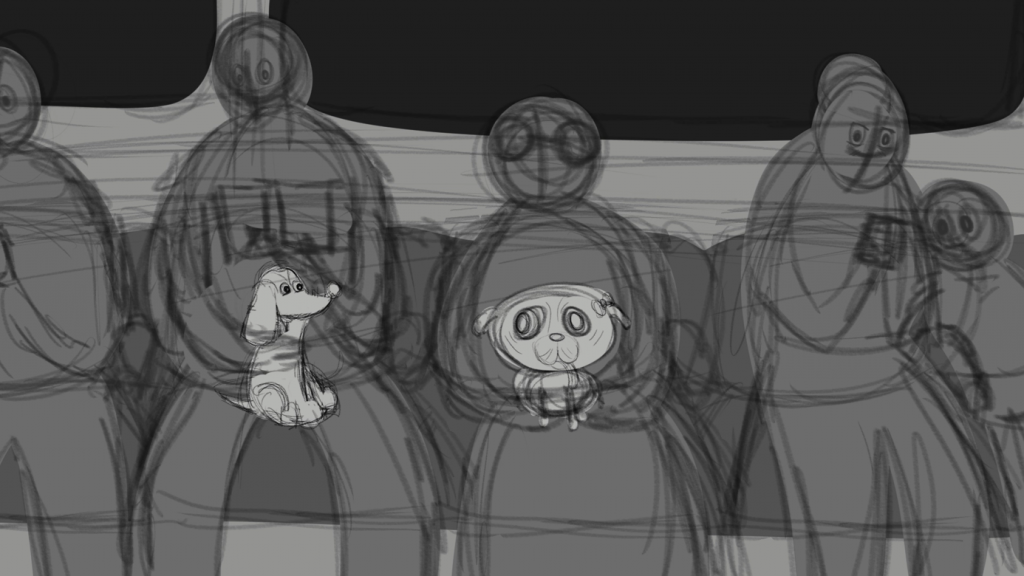
I applied Yappie’s new design to the animation, and also added the people on the train (not animated yet), which were made in Clip Studio Paint before adding a transparent layer below it and being imported into Toon Boom Harmony.
Third version of my animation (sketch complete). Click the photo above to be redirected to Padlet.
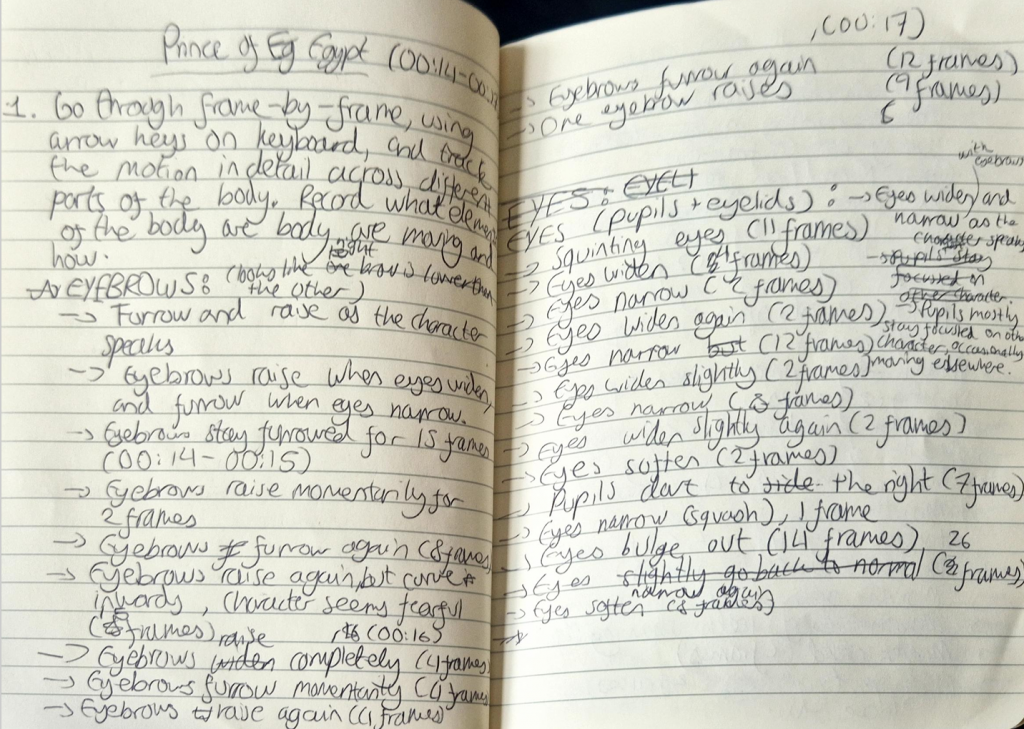
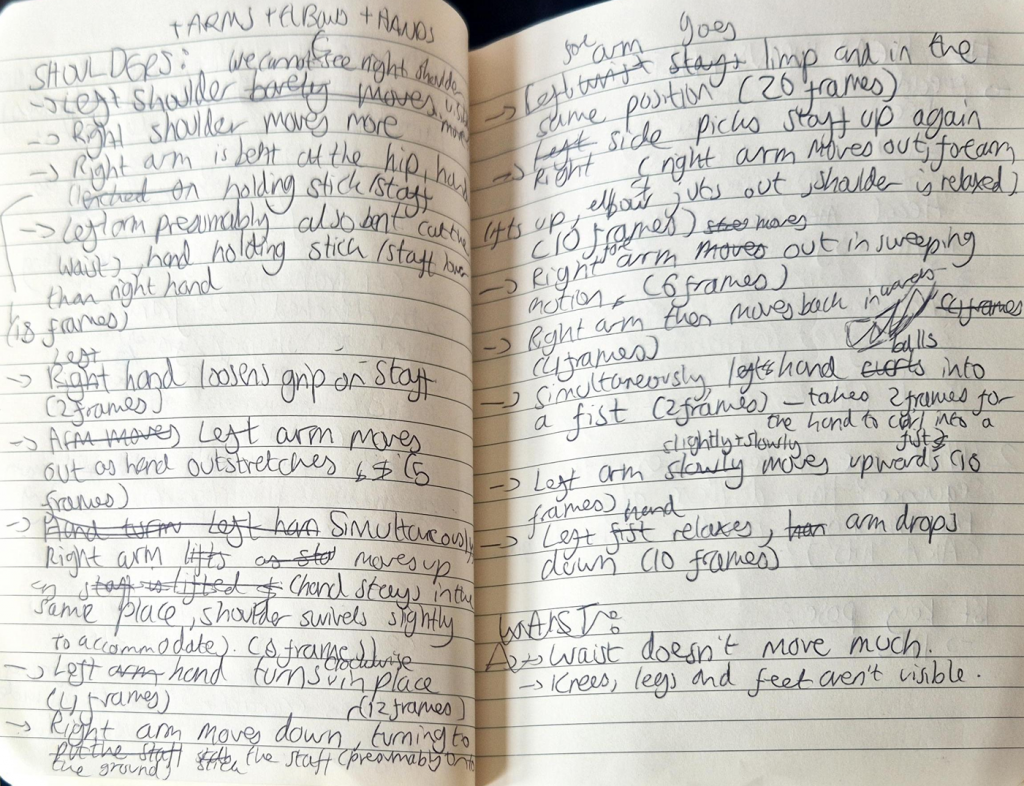
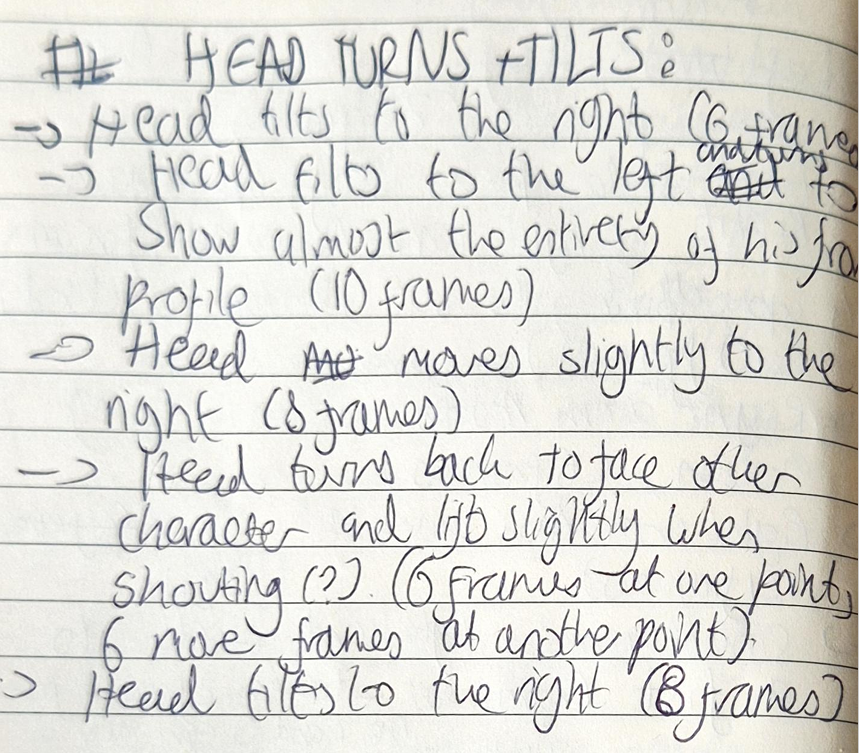
Interlude:Prince of Egypt Animation Analysis(04/03/26)
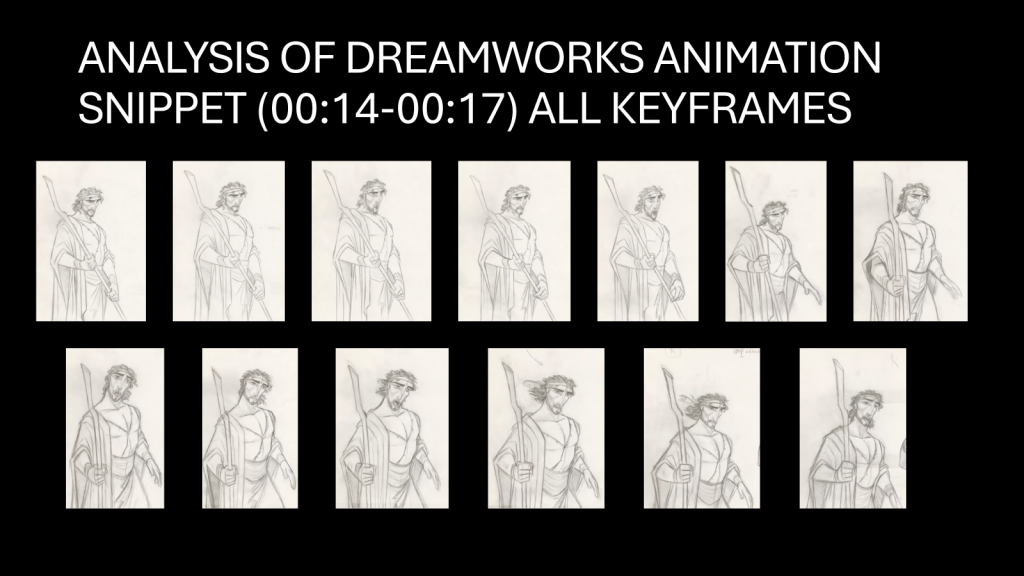
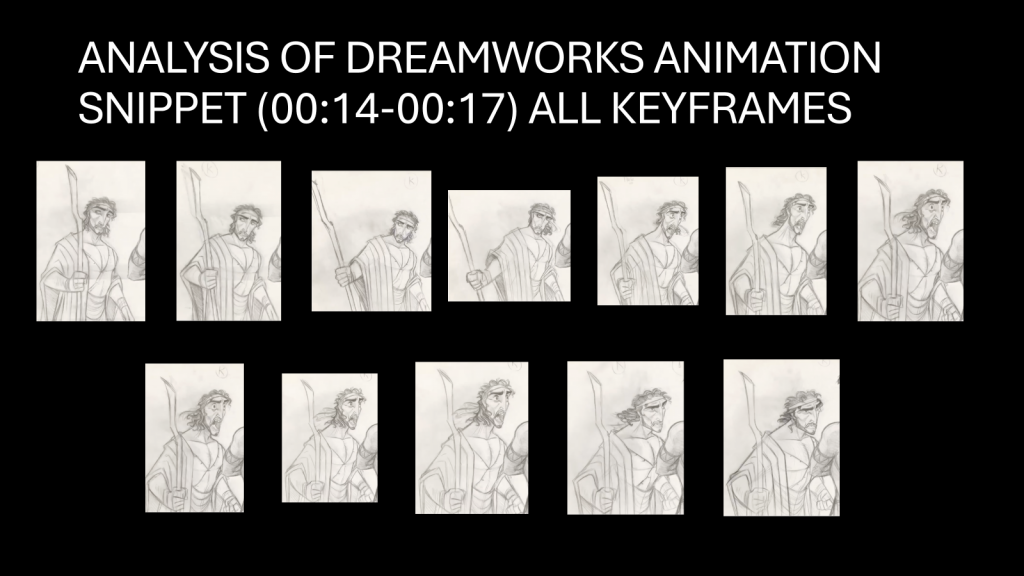
After recapping the 12 Principles of Animation, we were tasked to analyse a Dreamworks Line test frame-by-frame. This was my analysis:
Key poses:
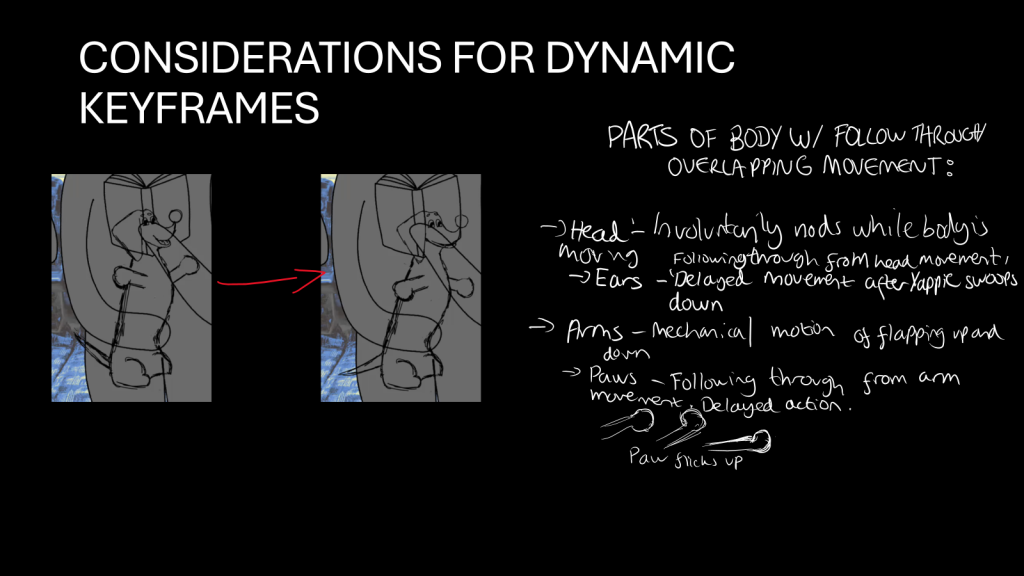
The animation tests helped us study character acting, and understand how to effectively overlap movement of different body parts with fluidity. I then applied what I learned into my animation, where it was especially useful when animating Yappie’s dynamic gestures. Since she moves around a lot, I needed to time each movement properly, especially when she flaps her arms while swaying (“F*cking pterodactyls”).
Back to the Project
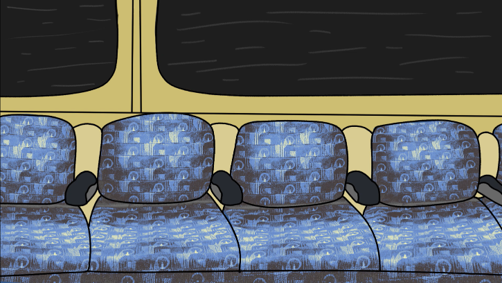
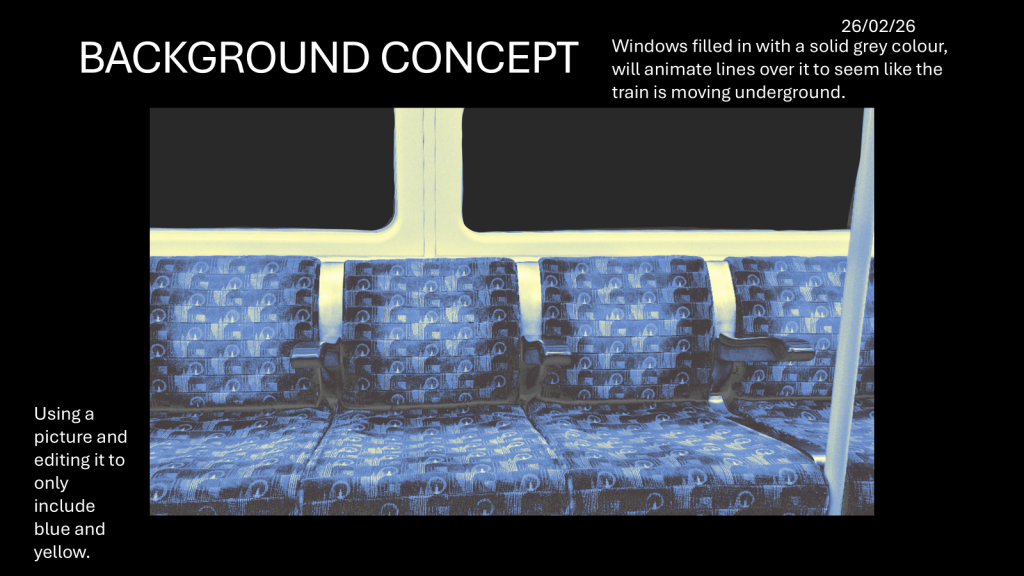
For the background, I added the texture of the seats, and found I preferred it to my previous experimentations. Therefore, I animated it by duplicating it and adding lines to the windows (learned this tactic in Foundation).
Background animation. Click the photo above to be redirected to Padlet.
It was then added it to the animation, after which I began the lineart process. This was surprisingly quick, and so I was able to move onto in-betweening and lipsync immediately after. Overall, this took 2 weeks to complete, including animating the people moving.
Fourth version of my animation (lineart and in-betweens complete). Click the photo above to be redirected to Padlet.
Fifth version of my animation (lip-sync complete). Click the photo above to be redirected to Padlet.
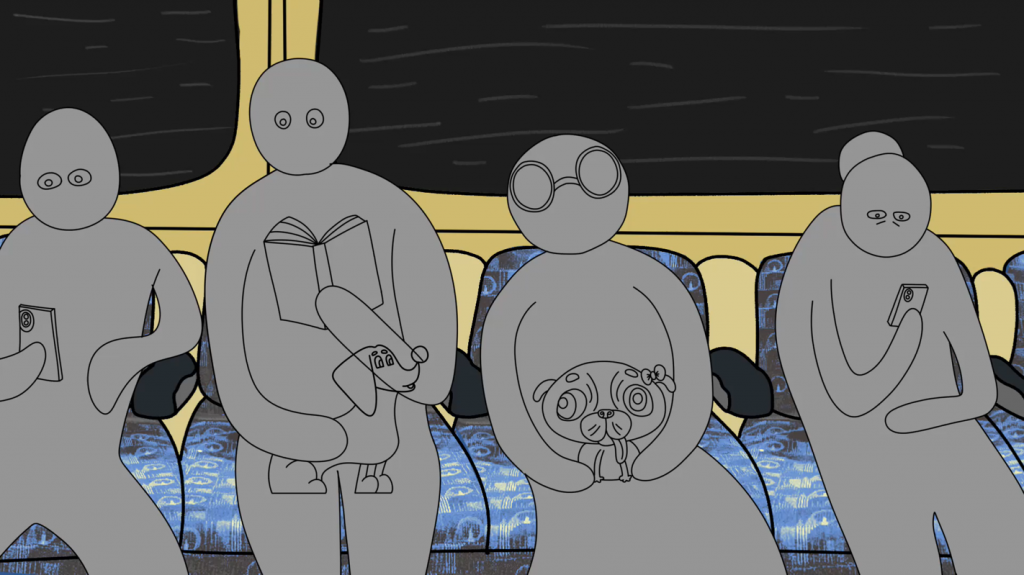
For the presentations, I didn’t want to leave the animation colourless, but I was hesitant to add colour to the dogs as I felt it may clash with the people’s greyscale tone. Therefore, I merely added greyscale to the people. Yappie kept clipping into her owner, so I cut their arm and pasted it on another layer, before using the stroke tool to add colour. Thankfullly, the presentation went well, and I was pleased with the feedback I received.
Sixth version of my animation (value blocking complete). Click the photo above to be redirected to Padlet.
During the Easter holidays, I finished the animation. Colouring was the most arduous part of the production process, as often my lineart didn’t connect and I had to manually fix each frame using the stroke and close gap tools. Moreover, the “apply to all frames” function never worked and instead coloured everything wrong, thus adding to my frustrations. It honestly felt like a relief when I finally finished. Animating the tail also took a long time, but somehow I found more enjoyment in that, and liked making it appear as if Yappie’s tail is its own entity.
I am extremely happy with my final outcome, and believe I have definitely achieved all of my aims for this elective. One thing I wish I could have done is compositing, which I believed I didn’t need at the time. While the animation does still look good without lighting, I think it would have definitely tied the entire piece together. Whilst this elective was highly intensive, I still greatly enjoyed it.
This lesson we learned about background design and its significance in animation. We were taught colour theory and how different colours shift the atmosphere of the piece, so to be mindful of what colour palette to choose if we wanted our backgrounds coloured (it wasn’t mandatory). The same logic applied to values, and how much contrast we wanted for the piece which would then be translated into colour. Personally, I have always used the greyscale method when making art before colouring it, as I like deciding whether I want to leave it like that or not. I’m not a fan of colouring as it means I have to decide what my colour palette is, and adding other colours to stick to said palette is time-consuming.
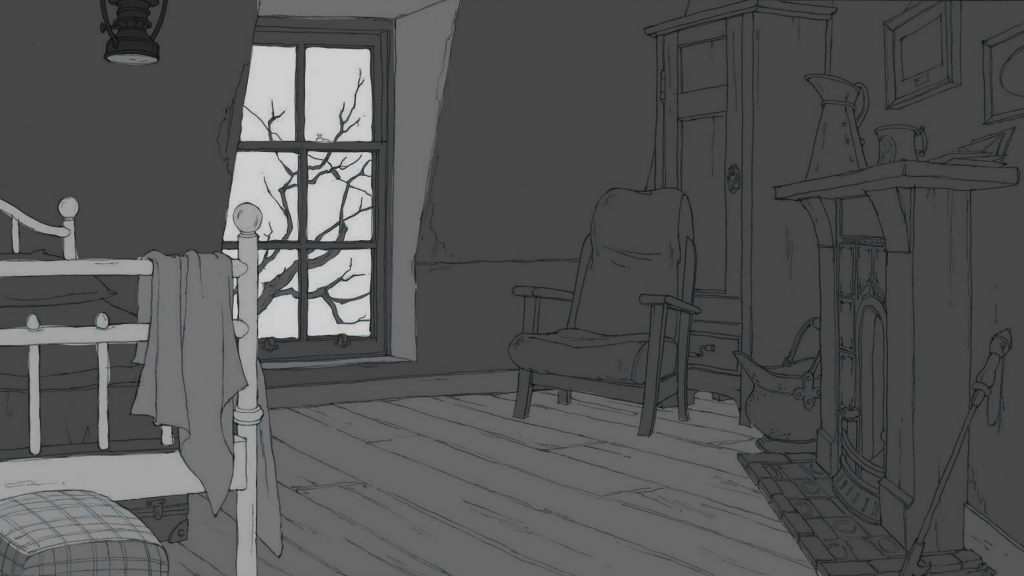
The task for today was to use a template given to us and add values to it depending on what we wanted the mood to be. I thought I would enjoy the task, but I spent too much time pondering on which mood to set. By the end, I still hadn’t decided, which is why my outcome is unfinished.
We were told to consider the following aspects for our characters and backgrounds, and decide what our criteria should be when ultimately combining everything together:
Background
Characters
Canvas size
1920×1080
N/A
Aspect Ratio
16:9 (HD)
N/A
Colour palette
Blue, yellow and grey
Tan and brown (depending on dog breed)
Texture and grain
Possibly mixed-media, photorealism for the seats? Otherwise no other textures/grains.
Possibly textured brushes?
Shape language
N/A
Yappie: sausage-like, small head long body Schnorkle: shaped like an inverted 8, big head small body.
Line
Monoline, no line weight
Monoline, no line weight
Lighting
Ambient lighting, in line with typical train interiors
Ambient lighting
Wednesday (25/02/26):
I wasn’t in for this lesson, which was unfortunate as we were learning about X-sheets.
On Thursday, I felt better enough to work on the project, so the first thing I made was a character turnaround sheet for Schnorkle (even though she’s stationary in the animatic).
Initial Schnorkle character turnaround.
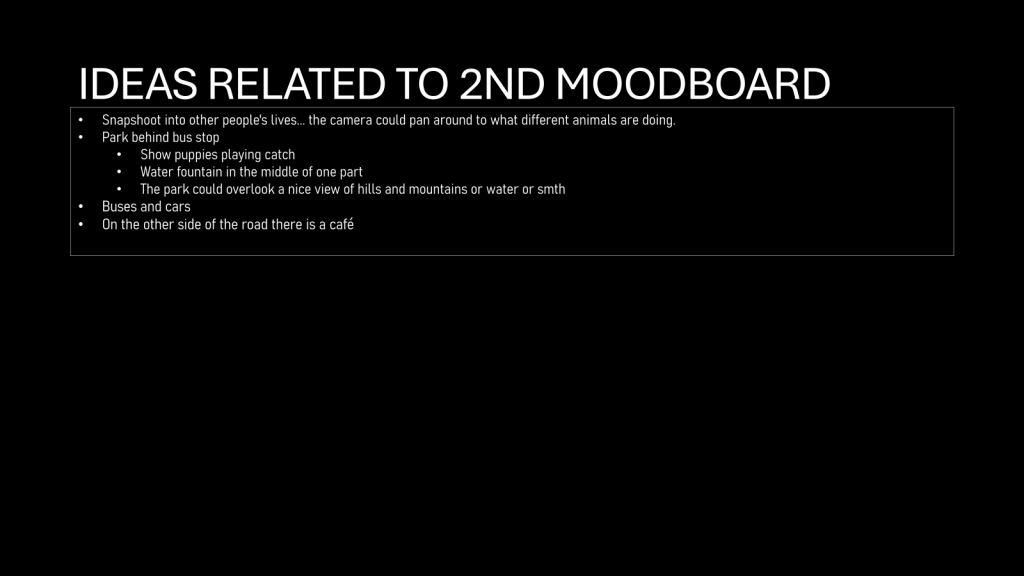
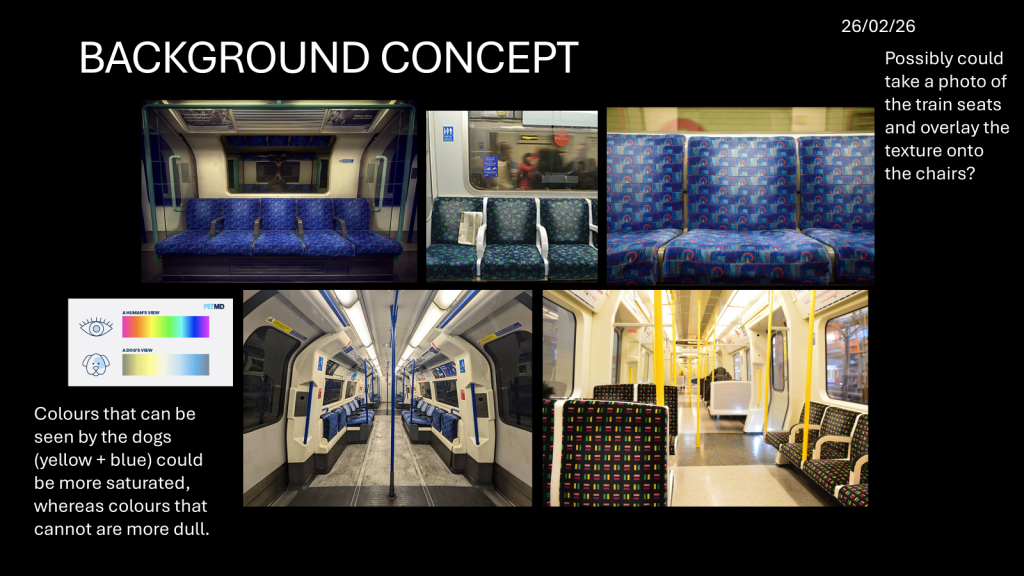
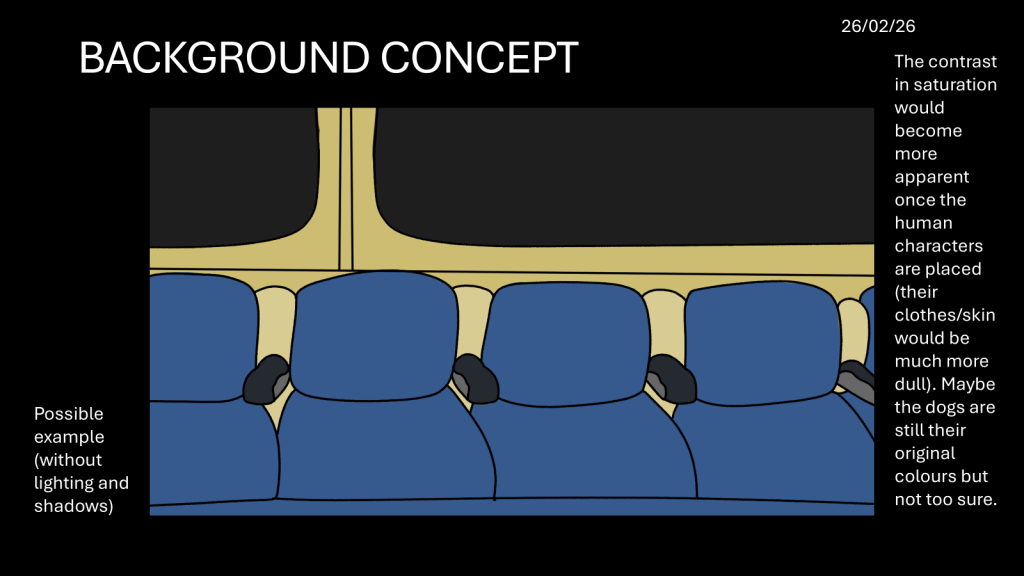
Then, I brainstormed background concepts, and created a moodboard based on my ideas. I then digitally drew the interior of a train using a reference photo I took last year for a foundation project (also about trains), and used the blue/yellow/grey colour scheme.
From this, I was able to flesh out the background for the animatic, and cleaned-up + added values to subsequently be presented on Friday.
Animatic second draft. Click the photo above to be redirected to Padlet.
Friday (27/02/26):
On Friday, we had our pre-production review point, in which presented what we currently had to our peers, who then gave extremely helpful feedback that we could then use to improve. The feedback I received was as follows:
Remove Yappie’s eyebrow crease as she looks villainous and replace them with eyebrows
Possibly make Schnorkle react when Yappie gets closer (eyes widening? Moving away slightly? Blinking?) — this may retract from Schnorkle’s personality as the comedic part is her being unaffected while everyone else on the train is being disturbed?
Think about weight distribution: when Yappie sits, have a paw more forward when leaning to cushion her weight, have more squash when she sits back down, etc.
Possibly make Yappie’s face more heart-shaped? Add indents to her forehead to achieve that.
Live action background — could use a photo and animate the background by adding lines that move in the windows (depicting the movement of the train).
More simplistic human characters, but have them match the artstyle of the main characters for consistency.
Do colour tests: see what works more, whether dog colour palettes would be affected by the overall colour scheme or not.
Afterwards, we learned about how to construct mouth shape sheets, and how to keep our character designs consistent when mapping out each letter/syllable.
During the weekend, I finished my animatic using the feedback I was given.